 Lisa Richards
Do you know why you are looking to know how to make a stroller diaper cake? Well, let me guess and explain the matter clearly.
Are you invited to attend a baby shower but cannot gather up ideas regarding the gift? Obviously, you cannot give the to-be-mother a bottle of Chardonnay and the gift has to be something apt that goes with the event or theme of the party.
Of the many things that say ‘baby is coming’, diapers are probably the most common of them all. Moreover, a pack of diapers does not really convey emotional best wishes.
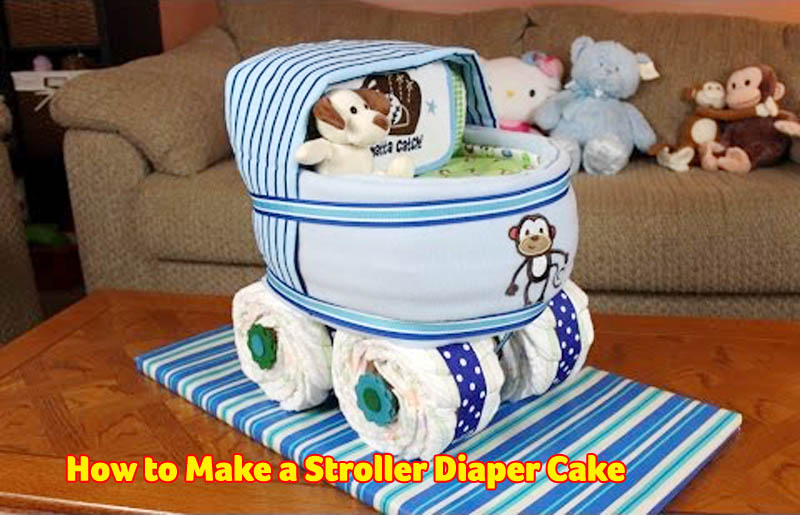
What if we could construct a piece of personalized something with diapers that really mean something? How about a stroller diaper cake in the cutest of forms for the expectant mother?
Let us go into the making of such a cake.
Things You Need to Make a Stroller Diaper Cake
The best thing about making a stroller diaper cake is that the ingredients or small units are easily available at the baby store and the rest is already there in your cupboard. Moreover, it does not really take much time or expert skills to make this cute little gift.
- 60 medium sized diapers
- 2 shoeboxes (cleaned)
- A roll of elastics
- Colourful ribbons or any fabric of choice
- Rubber bands
- Hot glue gun
- An assortment of baby supplies like bottles, pacifiers, toys, etc
Methods are Need
Here are common few methods that you can follow.
Base
- Remove the tops of the shoeboxes. You will not require the covers for making this cake.
- In one of the shoeboxes make a cut of 0.25″ at the end.
- Now this timed shoe-box shall be placed inside the uncut shoe-box in a vertical standing manner so that the entire structure forms an ‘L’ shape.
- Apply hot glue along the internal edges of both the shoeboxes so they remain intact in that position.
- Wrap a few elastic around the fringe of the base shoebox loosely. Glue the ends and keep it to dry completely.
Placing the Diapers
- Roll the free end of all the diapers towards their insides until the point when all the rolls are light and pleasant. Wrap an elastic around the diapers to hold the shape.
- Slide each of those rolled diapers under the elastic glued to the base. Keep repeating this till the whole perimeter of the base box is encompassed by diapers.
- To frame the shelter of the stroller, a band of elastic has to be wrapped around the vertical box. Slip the flexible elastic underneath the other one. Glue the closures and put it to dry.
- Just as before, roll and tightly secure more diapers over the top portion and side edge of the vertical box, ceasing at the convergence with the box down below.
- Elastic from the upper box will project on the two sides. Shroud it by securing it in the middle of the upright diapers on the lower box.
Decoration
- Use any ribbon or fabric f your choice for decoration or make it colour coordinated with the gender of the baby. Wrap the pretty ribbons along the bottom to hide the elastic band lining. To secure the ends of the ribbons, use hot glue and be careful not to spill any on the diapers.
- Do the same on the top or hood of the stroller covering the elastic. The decorative step is your own choice and you can go crazy with creative ideas.
Wheels
- For the wheels, roll up five diapers together and tightly secure them with a rubber band.
- Decorate the diaper wheels with ribbons to hide to elastic lining. The loose ends of the ribbon or fabric should be glued in.
Final Step
- Secure the wheels onto the stroller with the help of hot glue. Stick them to the bottom in shape for a four wheeler.
- You are now left with a space in the stroller. Fill this up with gifts that you have collected in a shapely manner and add a bow to finish off the look. Your diaper stroller is ready!
Conclusion
It did not look very complicated, did it? If you are willing to make a bigger size of it, just throwing in some more rolled diapers and you are good to go. It will definitely be a hit of the party!
- Top 5 Convertible Car Seat – Reviews & Buying Guide
- Top 10 Double Stroller For Infant And Toddler – Reviews & Buying Guide
Leave a Reply
You must be logged in to post a comment.